
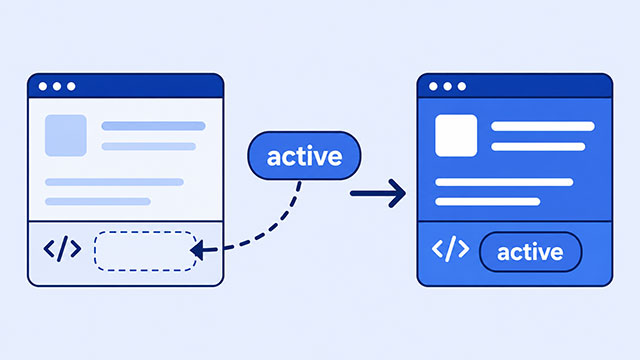
If JavaScript adds a CSS class but the page still looks the same, one part of the change is probably not lining up with the others. The class name, the HTML element, the CSS selector, and the style that wins must all agree. By the end of this article, you will have a simple order for checking each part.
Think of the change as a three-part handoff. JavaScript gives an HTML element a class name. CSS looks for that class on the page. The browser then applies the matching style.
If one part uses a different name, points to a different element, or loses to another style, you may see no visible change. That does not always mean the JavaScript failed.
Start With a Working Three-Part Example
This example has one card. The HTML creates it, the CSS describes its normal and active appearances, and JavaScript adds the active class.
First, the HTML gives JavaScript an element to find:
<div id="projectCard" class="card">
    My first project
</div>
Next, the CSS creates a clear visual difference between the normal card and an active card:
.card {
    background: lightgray;
    color: black;
    padding: 20px;
}

.active {
    background: darkblue;
    color: white;
}
Finally, JavaScript finds the card and adds the class:
document.querySelector('#projectCard').classList.add('active');The card should now have a dark blue background and white text. JavaScript has changed the HTML to act as if it contained class="card active". The matching CSS rule supplies the new appearance.
If your version still looks unchanged, keep this working handoff in mind as you go through the checks below.
Check the Class Name in Both Places
The class name in JavaScript must match the CSS name. Even a small difference creates two separate names.
One especially common mistake is putting a period inside classList.add():
/* This does not add the class name you want. */
document.querySelector('#projectCard').classList.add('.active');

/* This adds the class named active. */
document.querySelector('#projectCard').classList.add('active');
The period in .active is part of the CSS selector. It tells CSS to look for a class. The class name itself is only active, so JavaScript needs 'active' without the period.
Spelling and capitalization must also match. active, Active, and activated are different class names. Pick one spelling and use it everywhere.
Check Which HTML Element JavaScript Changes
A class can be correct but placed on the wrong element. Look at this card with a heading inside it:
<div id="projectCard" class="card">
    <h2 id="projectTitle">My first project</h2>
</div>
This line adds active to the heading:
document.querySelector('#projectTitle').classList.add('active');This line adds it to the whole card:
document.querySelector('#projectCard').classList.add('active');Those lines change two different parts of the page. If the CSS expects an active card, adding the class to the heading will not create the same result.
Compare the name inside querySelector() with the id in your HTML. Ask a concrete question: “Do I want to change the title, or the box around the title?” Then select that element.
Check Whether the CSS Selector Matches That Element
CSS needs a selector that describes the class in its actual location. A small space between two class names changes what the selector means.
This selector has no space:
.card.active {
    background: darkblue;
}
It matches one element with both classes, such as:
<div class="card active">My first project</div>This selector includes a space:
.card .active {
    background: darkblue;
}
It looks for an element with active inside an element with card, such as:
<div class="card">
    <h2 class="active">My first project</h2>
</div>
Neither selector is automatically better. They describe different HTML. The useful question is whether your selector describes where JavaScript placed the class.
If this difference feels unfamiliar, the lesson on how CSS selectors match elements gives you the foundation without adding more JavaScript.
Check Whether Another CSS Rule Wins
Sometimes the class is in the right place and the selector matches, but another CSS rule asks for a different value. The browser must choose one final style for the element.
That decision process is called the cascade. In this small example, both selectors have the same strength, so the later rule supplies the background:
.active {
    background: darkblue;
}

.card {
    background: lightgray;
}
An element with class="card active" still appears light gray. The active class is present, but the later .card rule gives the background its visible value.
For this example, you can make the active appearance clearly describe a card that is active:
.card {
    background: lightgray;
}

.card.active {
    background: darkblue;
}
Now the second rule matches a card with both classes and provides the intended active background. Keeping a state rule after the basic card rule also makes the change easier to follow.
Avoid adding !important just to force the color to change. It can hide the real conflict and make later styles harder to understand. The lesson on how the cascade chooses a style explains why matching rules can produce different results.
Use This Quick Troubleshooting Order
When the page does not change, check one part at a time. This order moves from the smallest mismatch to the CSS decision that can be harder to notice.
- Match the name. Use the same spelling and capitalization in CSS and JavaScript.
- Remove the period. Write
classList.add('active'), notclassList.add('.active'). - Check the element. Make sure
querySelector()finds the part of the page you intend to change. - Match the selector. Decide whether the same element has both classes or one class is on an element inside another.
- Check competing rules. Look for another matching rule that gives the same property a different value.
After each check, update the code and look at the page again. Change one thing rather than rewriting the whole example. That makes it easier to tell which correction mattered.
For a small practice exercise, begin with the working card. First add a period inside classList.add(), observe that the active appearance is missing, and fix it. Then restore the working code and move active to the heading. Each change lets you see one handoff problem by itself.
What to Learn Next
Once the three-part handoff makes sense, use these lessons to practice the change and strengthen whichever part caused the confusion.
- Practice adding a class with JavaScript to see the complete HTML, CSS, and JavaScript pattern in a guided lesson.
- Review how CSS selectors match elements to understand which element a style rule affects.
- See how the cascade chooses a style when more than one matching rule sets the same property.
- Run the change after a button click when you are ready to connect the class change to a visible interaction.