
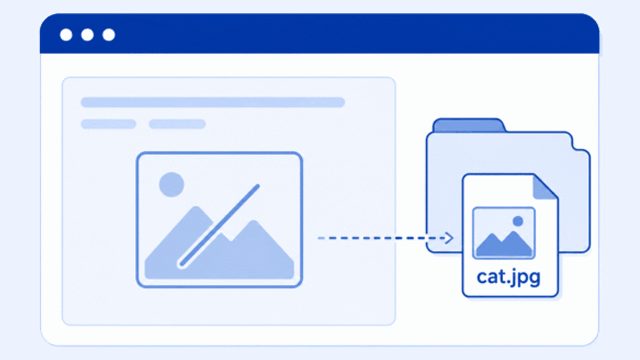
If your HTML image isn’t showing up, the problem is usually smaller than it feels.
Most broken images come from one of a few things: the file is in the wrong place, the file name does not match, the folder path is incorrect, or the image extension is different from what you typed in the code.
That can be frustrating when you’re new, because the browser usually does not explain the problem in a helpful way. It just shows a broken image icon or leaves an empty space on the page.
The best way to fix it is to slow down and check one thing at a time.
Start With a Correct Image Tag
A basic image tag looks like this:
<img src="images/cat.jpg" alt="A gray cat sitting on a chair" width="600" height="400" />There are three main parts to notice here.
srctells the browser where to find the image file.altdescribes the image for people who cannot see it or when the image does not load.widthandheighthelp the browser save the right amount of space for the image.
If the image is broken, the first thing to check is the src. The src value has to point to the real image file in the real folder where that file lives.
If you want the basic image lesson first, start with HTML Images. This article is focused on what to check when the image is already broken.
Check That the File Really Exists
This sounds obvious, but it is one of the most common problems.
The browser can only show the image if the image file is actually inside your project or available from a real web address.
- Open the folder for your project.
- Find the image file with your own eyes.
- Make sure the image is not still sitting in Downloads.
- Make sure the image is not on your desktop while your HTML file is somewhere else.
- Make sure the image is inside the folder your code is trying to use.
If your HTML file says the image is in an images folder, then there needs to be an images folder, and the image needs to be inside it.
This connects to the idea of base files. A small website usually works best when your HTML, CSS, and image files are organized in a simple project folder.
Check the File Name Exactly
The browser is very literal. The file name in your HTML needs to match the real file name exactly.
These are not always the same thing:
cat.jpg
Cat.jpg
cat.JPG
cat.jpeg
cat.png
To a person, those all look close enough. To a browser, they may be completely different files.
A good beginner habit is to keep image names simple.
- Use lowercase letters.
- Use hyphens instead of spaces.
- Avoid special characters.
- Keep the name short enough to type correctly.
Instead of this:
My Cat Photo Final Version 2.JPGUse something like this:
cat-photo.jpgSimple names make simple mistakes easier to avoid.
Check the Folder Path
The folder path is the part of the image tag that tells the browser how to get from the HTML file to the image file.
If the image is in the same folder as the HTML file, the path can be very simple:
<img src="cat.jpg" alt="Cat" />If the image is inside an images folder, the path needs to include that folder:
<img src="images/cat.jpg" alt="Cat" />If your HTML file is inside a folder and the image folder is one level above it, you may need to go up one folder:
<img src="../images/cat.jpg" alt="Cat" />The two dots mean “go up one folder.” This can feel strange at first, but it is just giving the browser directions.
You can also use a full image URL from the web:
<img src="https://example.com/images/cat.jpg" alt="Cat" />For beginner projects, it is usually easier to keep your own images inside your project folder so you can see everything in one place.
Check the File Extension
The file extension is the ending of the file name. It tells you what type of image file it is.
.jpg.jpeg.png.webp.gif
The extension in your HTML needs to match the real file extension.
This will not work if the real file is named cat.png:
<img src="images/cat.jpg" alt="Cat" />The browser will look for cat.jpg. If only cat.png exists, the browser will not guess what you meant.
Check for Smart Quotes or Copy-Paste Problems
HTML should use normal straight quotes around attribute values.
This is correct:
<img src="images/cat.jpg" alt="Cat" />Sometimes, if you copy code from a document, email, or word processor, the quotes can turn into curly smart quotes. They may look nicer in writing, but they can break code.
If you are not sure, delete the quotes and type them again directly in your code editor.
This is also a good reason to write code in a plain text editor or a coding editor instead of a word processor.
Save the File and Refresh the Browser
Sometimes the code is fixed, but the browser is still showing the old version of the page.
- Save the HTML file.
- Refresh the browser.
- Try a hard refresh if the image still does not appear.
- Close and reopen the page if needed.
When you are learning, it is easy to forget the save step. You can make the correct change in your editor, but the browser will not see it until the file is saved and the page is refreshed.
This is part of local development. You change a file, save it, refresh the browser, and check what changed.
Use the Browser to Test the Image Path
If you are still stuck, test the image by itself.
- Drag the image file into the browser.
- Confirm the image can open on its own.
- Look at where the image is located.
- Compare that location to the path in your
src.
You are asking one simple question: can the browser find this image from where the HTML file is?
If the browser cannot find the file, the image tag will not work. If the browser can find the file by itself, then the problem is probably the path you typed in the src.
Use the Browser Inspector If You Can
This step is optional, but useful.
Most browsers include developer tools. If you right-click the broken image and choose Inspect, you can often see the exact image path the browser is trying to load.
You do not need to understand every part of the inspector. Just look for the src value and compare it to your real file location.
This is a small version of quality assurance. You are checking the page carefully instead of guessing.
A Simple Beginner Checklist
If your HTML image is not showing, go through this list in order.
- Is the image file inside your project folder?
- Is the image in the folder your code says it is in?
- Does the filename match exactly?
- Does the extension match exactly?
- Are you using straight quotes?
- Did you save the HTML file?
- Did you refresh the browser?
- Can you open the image directly in the browser?
Do not change everything at once. Check one item, test the page, then move to the next item. That is how debugging works.
A Quick Example of a Working Folder Setup
Here is a simple project folder:
my-website/
    index.html
    images/
        cat.jpg
If index.html is using cat.jpg, the image tag should look like this:
<img src="images/cat.jpg" alt="Cat" />That path works because the HTML file and the images folder are next to each other inside the same project folder.
If you move the image, rename the image, or rename the folder, you also need to update the src.
What to Learn Next
Once your image is working, the next step is understanding how images fit into the rest of a page.
- HTML Images explains the image tag,
src,alt, width, and height. - Inline Elements explains how images, links, and other inline content behave inside HTML.
- Base Files helps you understand the simple files that make up a beginner website.
- Local Development explains how to work on website files on your own computer.
- Quality Assurance explains how to check your work carefully before calling it done.
The main idea is simple. A broken image usually means the browser cannot find the file you told it to use. Find the file, match the name, match the extension, check the folder path, save, and refresh.